As a videographer or filmmaker, you know that movement is a crucial element of storytelling. Whether you’re panning across a breathtaking landscape, following a character through a crowded city street, or simply adding a bit of motion to an otherwise static shot, camera movement can help bring your videos to life.
And when it comes to creating smooth, professional-looking movements, a camera slider is an essential tool. A camera slider is a rail system that allows you to move your camera smoothly and steadily, creating cinematic shots that are sure to impress. In this article, we’ll explore why a camera slider is a must-have tool for any filmmaker or videographer, and how you can use it to take your videos to the next level. So sit tight, grab your popcorn, and get ready to learn all about the magic of camera sliders!
Introduction
The purpose of video production is to tell a compelling and engaging visual story. Movement is one of the most important aspects of that story. Camera movement can help to add depth and dimension to your shots, draw the viewer into the action, and add interest and drama.
This is where a camera slider comes in handy. A camera slider is a rail system that allows you to move your camera smoothly and steadily, resulting in cinematic shots that will wow your audience. In this post, we’ll look at camera sliders and how they can be used to create dynamic video content.
To begin, consider why camera movement is so important in video production. Movement is what gives a video life and a sense of excitement. Your shots will feel empty and fixed without it. By integrating movement into your shots, you can create a sense of energy, momentum, and emotion that will help you tell your story more effectively.
However, creating smooth and consistent camera movement can be difficult. This is where a camera slider comes in handy. A slider enables you to move your camera in a controlled and precise manner, resulting in smooth, gliding, and professional-looking shots.
So, why use a camera slider? In this post, we’ll explore the benefits of using a camera slider in video production, and why it’s a must-have tool for any filmmaker or videographer.
What is a Camera Slider?
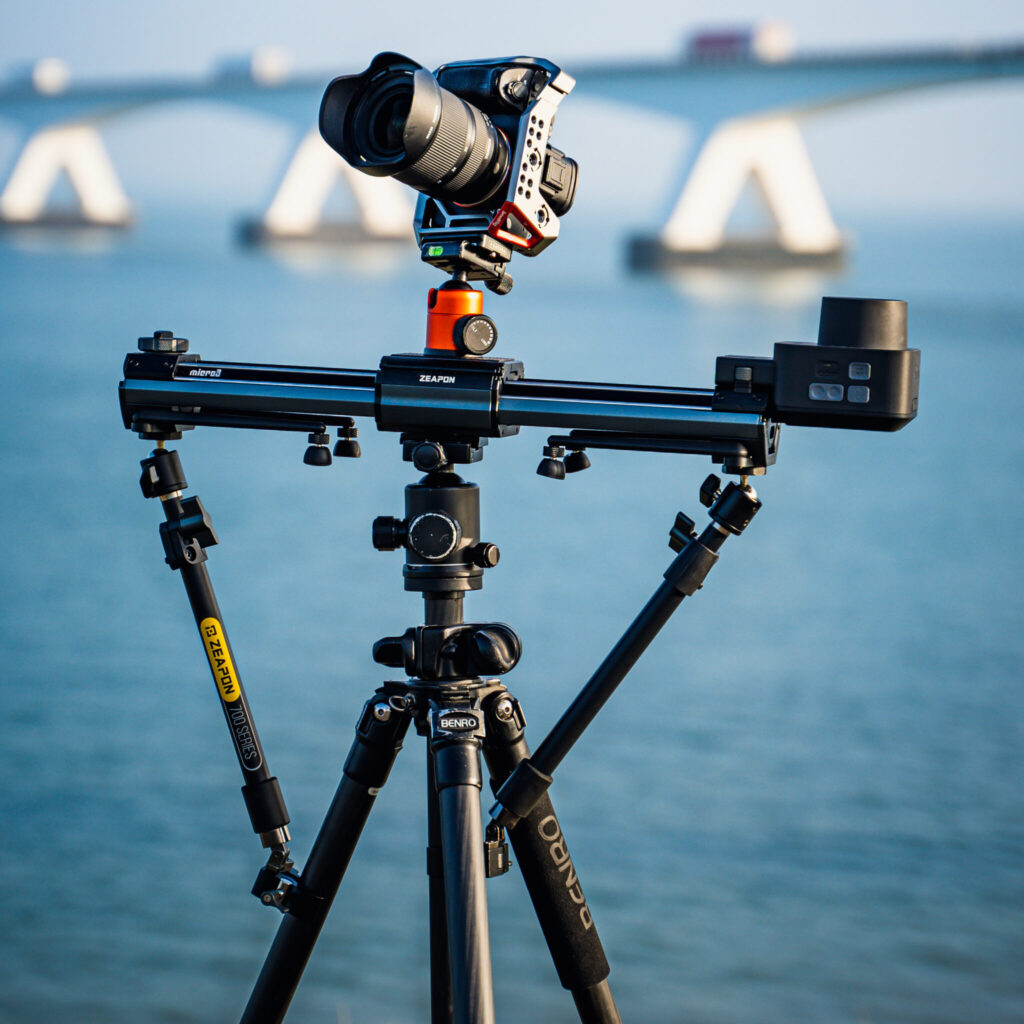
A camera slider is a tool that allows you to move your camera along a rail system smoothly and steadily. It is made up of two major components: the slider rail and the carriage.
The slider rail is the long metal or carbon fiber track on which your camera is mounted. The carriage is the component of the slider that connects to your camera and moves along the rail. The adjustable feet on most sliders allow you to level the rail on any surface.
Camera sliders range in size from a few inches to several feet. Longer sliders provide more movement and allow you to create more dynamic shots, but they are heavier and more difficult to transport.

Camera sliders are classified into two types: manual sliders and motorized sliders. Manual sliders require you to manually move the camera, whereas motorized sliders are automated and can be controlled via a remote or an app.
Manual sliders are less expensive and lighter, making them a popular choice for inexperienced filmmakers and videographers. Motorized sliders, on the other hand, cost more but provide greater precision and control, making them a better choice for professional video productions.
In the following section, we’ll look at the advantages of using a camera slider in video production and why it’s a good investment for any filmmaker or videographer.
Why Use a Camera Slider?
Camera sliders offer a range of benefits when it comes to video production. Here are just a few reasons why you might want to consider using a camera slider:
- Adds Movement and Interest – Camera sliders allow you to create dynamic, moving shots that add interest and dimension to your video. By smoothly and steadily moving your camera along a rail, you can create a sense of movement and momentum that helps to bring your story to life.
- Creates Professional-Looking Shots – Camera sliders can help to make your shots look more polished and professional. By eliminating the shakiness and instability that can come with hand-held shots, sliders can create smooth, gliding shots that look like they were captured by a professional.
- Increases Production Value – Using a camera slider can help to increase the production value of your video. With a slider, you can create more dynamic and visually interesting shots that can help to capture the attention of your audience and elevate the quality of your video.
- Offers Creative Opportunities – Camera sliders offer a range of creative opportunities when it comes to video production. By experimenting with different movements and angles, you can create unique and memorable shots that help to tell your story in a more compelling way.
In the next section, we’ll take a closer look at how to use a camera slider and some best practices for getting the most out of this tool.
Choosing the Right Camera Slider
When it comes to choosing the right camera slider for your needs, there are several factors you need to consider. In this section, we’ll discuss the most important factors to keep in mind when choosing a camera slider.
Factors to Consider:
Length – The length of the camera slider determines the range of motion and the types of shots you can achieve. Shorter sliders are more portable and suitable for tighter spaces, while longer sliders offer greater range and are ideal for outdoor shoots.
Weight Capacity – The weight capacity of a camera slider is another important factor to consider. The slider should be able to support the weight of your camera and any additional equipment you plan to use, such as a camera, microphone, and monitor.
Type of Movement – Camera sliders can move in a straight line or in circular or curved motions. Consider the types of shots you want to capture and choose a slider that can accommodate those movements.
Portability – If you plan to travel frequently with your camera slider, choose one that is lightweight and easy to carry around. Look for models that can be disassembled for convenient storage and transportation.
Material – The material of the slider affects its weight, durability, and stability. Most sliders are made of aluminum, carbon fiber, or stainless steel. Aluminum sliders are lightweight and affordable, while carbon fiber sliders are more expensive but offer greater stability. Stainless steel sliders are the most durable and long-lasting, but also the heaviest.
Types of Camera Sliders:
Linear Sliders – Linear sliders move in a straight line and are the most common type of camera slider. They are versatile and can be used for a variety of shots, from simple pans to more complex dolly shots.
Curved Sliders – Curved sliders move in a curved path, allowing for more creative and dynamic shots. They are ideal for capturing cinematic shots and can add a sense of movement and depth to your footage.
Motorized Sliders – Motorized sliders are operated by a motor and can be programmed to move in specific patterns and speeds. They are ideal for time-lapse photography and other specialized shots.
Recommendations:
Budget – For those on a tight budget, the Manual Zeapon Micro2 Plus Camera Slider is a great option. It is lightweight, portable, and affordable.
Mid-Range – The Zeapon Micro3 E700 is a popular mid-range option that offers smooth movement and high weight capacity.
Professional – For professional videographers, the Zeapon Micro3 E1000 combine PONS heads is a top-of-the-line option that offers excellent stability, smooth movement, and interchangeable rails for added flexibility, not saying the multi-axis system controls your camera and creates more vivid footage.
By considering these factors and choosing the right type of camera slider for your needs and budget, you can create stunning footage that takes your video production to the next level. In the next section, we’ll cover how to set up your camera slider for use.
How to Use a Camera Slider
Using a camera slider is easy, but it does require some practice to master. Here are some tips for using a camera slider effectively:
- Level the Slider – Before you start filming, make sure the slider is level. Use the adjustable feet on the slider to ensure that the rail is sitting evenly on the surface.
- Use the support rods and tripod– Do not select the slider without support rods unless you only apply the slider with a lightweight camera and the length of the slider is not too long, no supporting rods may occur fatal damage to your camera and other expensive gears, always make sure you support the slider well and stable. Besides, a heavy-duty tripod is good and can also make sure good support and secure your camera.
- Adjust the Speed – Decide on the speed you want to move the camera along the rail. This will depend on the shot you’re trying to create and the mood you’re trying to convey. You can either move the camera slowly for a more dramatic effect or quickly for a more energetic effect.
- Practice with Manual Sliders – If you’re using a manual slider, practice moving the camera along the rail by hand. Start slowly and gradually increase your speed to create a smooth, gliding motion, or just select a motorized one.
- Experiment with Angles – Try filming from different angles to create unique and interesting shots. For example, you can film from a low angle to create a sense of drama, or from a high angle to create a sense of perspective.
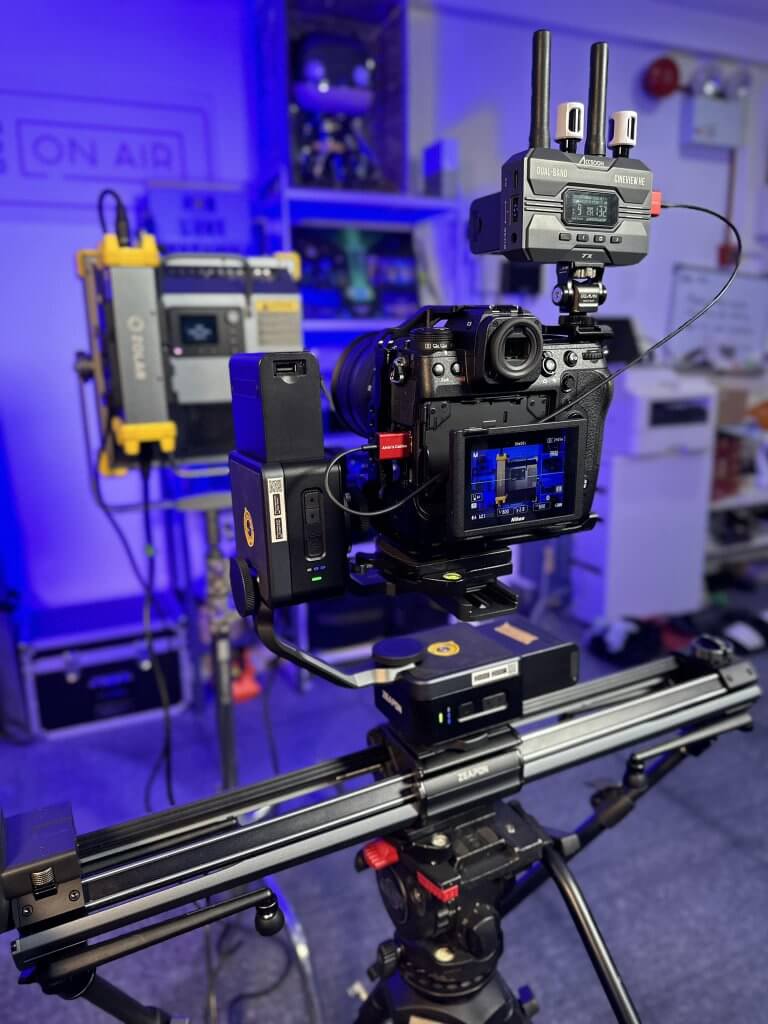
- Use in Conjunction with Other Tools – Camera sliders work best when used in conjunction with other tools, such as tripods, stabilizers, and gimbals. These tools can help to stabilize the camera and ensure that your shots are smooth and steady.
- Use a Remote for Motorized Sliders – If you’re using a motorized slider, use a remote control to move the camera along the rail. This will give you more precise control over the movement of the camera.
In the next section, we’ll explore some common mistakes to avoid when using a camera slider, and some tips for troubleshooting any issues you might encounter.
Common Mistakes to Avoid When Using a Camera Slider
While camera sliders can be a great tool for video production, there are some common mistakes that videographers make when using them. Here are some mistakes to avoid:
Moving Too Fast – One of the most common mistakes when using a manual camera slider is moving the camera too quickly along the rail. This can result in jumpy and unstable footage. To avoid this, start with slow movements and gradually increase your speed as you become more comfortable. But with the Zeapon Micro series slider, you have no worries about this part, with fluid dumping technology you can control the resistance when moving the slider.
Not Using a Tripod – Camera sliders work best when used in conjunction with a tripod. Without a tripod, your footage may be shaky and unstable. Make sure to use a tripod to stabilize your camera and ensure smooth movement.
Poor Planning – Another common mistake is not planning your shots ahead of time. Without a plan, you may end up with footage that doesn’t tell the story you intended. Make sure to plan out your shots in advance and think about how you want to use the camera slider to create dynamic and interesting shots.
Ignoring the Sound – Finally, it’s important to pay attention to the sound quality of your footage when using a camera slider. Moving the camera along the rail can create unwanted noise that can detract from the overall quality of your footage. To avoid this, use a directional microphone or record sound separately and sync it up in post-production, fortunately, the Micro3 motor can adjust the speed to make sure won’t be too noisy.
Conclusion
Camera sliders can be a valuable tool for videographers who want to add movement and dynamic shots to their productions. By following some basic tips and avoiding common mistakes, you can use a camera slider to create professional-looking footage that captures your audience’s attention.
We hope this post has been helpful in giving you a better understanding of how to use a camera slider. With practice and experimentation, you can use a camera slider to create stunning footage that takes your video production to the next level. So go ahead and give it a try, and don’t forget to have fun and be creative with your shots!